You must be signed in to read the rest of this article.
Registration on CDEWorld is free. You may also login to CDEWorld with your DentalAegis.com account.
In modern culture, judgments and opinions are often made solely on a person’s appearance. Because they are in the business of improving people’s appearances, dentists are aware that a large portion of their professional persona is based upon how they look and that their physical appearance fuels their confidence level. Research has shown that people who are attractive receive preferential treatment and are judged more positively.1 It can be said that an attractive smile is one that brings balance and proportion to the face, and that the “perfect” shade of white is the one that the patient believes looks best with his or her face. In a beauty- and media-driven society, having white teeth can be very important to patients.
Historically, tooth whitening is the most commonly used modality in cosmetic den-tistry. Despite this fact, 8 out of 10 people are unhappy with the appearance of their yellowing teeth,2 and only 25% of the pop-ulation has tried a professional whitening product.3 Of those consumers who have used an over-the-counter whitening product, 65% report that they would not recommend it, and only 2 out of 10 consumers have gone to the dentist for whitening treatment.3 There is a huge disconnect between the whitening needs of dental patients and their actual usage of whitening treatments.
Patients may not pursue whitening options because they are concerned about the cost or potential discomfort or because they do not understand the options that are available to them.
In addition, the busy pace of many dental offices may not be conducive to having a careful discussion with patients—in terms they understand—about their desire for an attractive smile or the options that the dentist can offer them to achieve that smile. With the proper engagement, clinicians can motivate patients to achieve the tooth color they desire and deserve, such as by introducing the 65% of patients who are dissatisfied with over-the-counter bleaching treatments to an in-office procedure or to take-home custom trays. Beyond increasing patient satisfaction, this presents a huge, untapped revenue source.
In order to create value and attain consensus, there are five basic questions that dentists should address with patients:
1. What Whitening Options
Are Available?
There are many pathways to achieving whiter, natural-looking teeth. Although over-the-counter products are simple to use and available in a variety of formats, including strips, pens, and brushes, the majority of patients are dissatisfied with the results they provide.3
Another option is for thewww.korwhitening.com dentist to fab-ricate custom trays in the office and dispense whitening gel (eg, KöR Whitening, www.korwhitening.com; Opalescence® PF, Ultra-dent Products, Inc, www.ultradent.com; Philips Zoom DayWhite, Philips, www.usa.philips.com) for the patient to apply at home. The success of this technique depends almost solely on patient compliance, which is usually inconsistent. Consequently, patients often express frustration and dissatisfaction when their teeth do not reach the desired shade, especially with the high level of expectations created by the amazing results seen on TV and in magazines.
To address patient compliance issues, the dentist can offer a third option—in-office power bleaching—which is a quick, safe, and predictable way to discern whether a simple solution to an esthetic problem can be accomplished. The dentist or his or her team professionally applies the product in the office. Although concentrations of up to 40% have been used with a barrier to protect the soft tissues of the face and the gingiva, 25% hydrogen peroxide has been proven to be a highly effective concentration,4 and adding a light source accelerates the process.
2. How Does the Whitening Process Work?
Teeth bleach as a result of the diffusion of hydrogen peroxide into the tooth structure. The diffusion increases with increased concentrations of hydrogen peroxide, increased time of exposure to the bleach, and the application of heat, light, or laser energy. Hydrogen peroxide is fast acting, breaking down into water and oxygen radicals in seconds.5 It permeates the enamel and dentin, reaching maximum whitening strength at 30 minutes and completing its reaction within 90 minutes. Carbamide peroxide, another whitening agent, breaks down into hydrogen peroxide and urea. A 10% concentration of carbamide peroxide produces 3.6% hydrogen peroxide. This reaction is complete within 4 to 6 hours, however, maximum whitening strength is reached at 2 hours. Carbamide peroxide is used in the nighttime products because of the longer exposure time available during sleep. Furthermore, there is less salivary flow during sleep, and therefore less dilution, which contributes to faster results.
Although using a higher concentration of hydrogen peroxide speeds up the whitening process, it can also increase the risk of sensitivity; therefore, highly sensitive patients should start with a lower concentration of hydrogen peroxide (6% instead of 14%) or carbamide peroxide (16% instead of 22%) and wear the trays for a shorter period of time (20 minutes versus 45 minutes).4,5 Whitening has a more dramatic and predictable result when treating yellow teeth than when treating grey teeth. In addition, monochromatic, even-toned teeth exhibit more predictable bleaching outcomes than striated, tetracycline-stained, or white-spotted teeth.
3. Why Is a Light Used?
The use of a light-activated whitening system with an in-office light increases the efficiency and speed of the whitening process. Although at-home whitening can provide excellent results when patient compliance is exceptional, that compliance is often lacking. The use of an in-office light provides a bleaching outcome similar to 14 days of continuous home tray use.6,7 When used at the outset of whitening treatment, this “jump start” can provide immediate satisfaction with smile improvement and increase patient compliance with at-home treatment in the months to come. Both systems can improve the whiteness of teeth by six to nine shades on the shade guide, but the light-activated systems can provide an additional 1 to 2 shade guide improvements when compared with the non-light-activated systems.6,7
The best results are obtained with 25% hydrogen peroxide because it has the most optimal absorption kinetics. The Zoom WhiteSpeed lamp (Philips, www.usaphilips.com) produces very little heat due to its narrow light spectrum. Tooth stain, which is often caused by double carbon bonds imbedded in the organic portion of the tooth, is more effectively broken down by hydrogen peroxide in the presence of the blue light created by the lamp’s light-emitting diodes. The blue light is also absorbed by the yellow stains in the dentin.8
4. Will Whitening Cause Any Short-Term or Long-Term
Harm to Teeth?
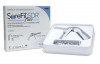
During or after the whitening process, patients may experience a temporary increase in tooth sensitivity. This sensitivity can range from a mild reaction to cold temperatures to a severe, shooting pain that occurs during the procedure and may last up to several hours after treatment. Prior to whitening treatment, any history of temperature sensitivity should be noted, and patients with a history of sensitivity should be prescribed a pre-bleaching regimen for 2 weeks. This regimen requires the use of a desensitizing toothpaste that is free of sodium lauryl sulfate, such as Sensodyne ProNamel® 5000 (GlaxoSmithKline, www.pronamel.us). If the reported sensitivity is severe, a desensitizing gel such as Relief ACP Zoom by Phillips should be placed in a custom whitening tray and worn daily for 1 hour during the week prior to the bleaching appointment and for 1 hour immediately following the procedure.9 These gels may also contain remineralization components that will increase the microhardness of the enamel.10
Sensitivity during the bleaching procedure is likely caused by the penetration of the hydrogen peroxide through the enamel and dentin and into the pulp, which creates a reversible pulpitis.11 Sensitivity is transient,12 and an analgesic (eg, ibuprofen 600 mg) should be administered at the onset of the procedure.13
5. When Is Whitening Needed?
A quick and easy shade assessment should be provided for each patient. Using a smart phone, a team member takes a preoperative photograph with the Vita shade guide (VITA, www.vitanorthamerica.com) positioned next to the whitening shade guide at the lower lip line (Figure 1). The preoperative color is chosen, and a second preoperative photograph is recorded using only the single shade tab that matches the preexisting darker color. It is placed on the left half of the photograph (ie, the patient’s right side) (Figure 2).
The whitening conversation begins with the dentist and the patient looking at the photographs together on a computer screen. After the patient verifies the initial shade, as a comparison, he or she is shown photographs of other patients who presented with a similar preoperative shade and subsequently completed whitening and bonding (Figure 3 through Figure 5). At this time, the appropriate whitening options for each patient’s particular clinical situation can be discussed, and he or she can choose the product that best fits his or her lifestyle, habits, esthetic expectations, and budget.
When the procedure is complete, either in-office or at-home, team members should follow a checklist for the postoperative evaluation. A final postoperative photograph is taken with the original single shade tab that matched the preexisting darker color placed on the left half of the photograph (ie, the patients right side) and the new single shade tab that matches the whitened teeth placed on the right half of the photograph (ie, the patient’s left side) (Figure 6).
When discussing the results with the patient, using specifically scripted language helps to convey that the treatment was successful, dramatically improving their appearance. First, the doctor should ask a team member, “What shade of yellow was the beginning shade?” followed by “What shade are the teeth now?” The team member should answer with an enthusiastic response, such as, “Doctor, they have whitened all the way to the 010 whitening shade tab!”
Express excitement, reemphasize the results, and show the patient the photographs. Patients should be told that they will receive the photographs via email and encouraged to share them with friends and post them on social media. Particularly satisfied patients can even be asked to provide a review for the practice.
Case Report
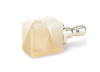
A 30-year-old female patient presented with right lateral and central incisors that were fractured in a fall (Figure 7). Radiographs were taken, and clinical testing revealed a fracture-free root and a vital pulp. The patient was presented with restorative options including porcelain and composite restorations. She chose direct composite restorations based on her desire to conserve tooth structure. After reviewing photographs of previous patients, the whitening discussion was undertaken. The patient expressed that she preferred the quickest solution to attain the whitest smile possible, so in-office power bleaching was chosen.
Clinical Protocol
A 25% hydrogen peroxide bleaching gel (Philips Zoom WhiteSpeed) was applied three times in 15-minute cycles, for a total exposure time of 45 minutes. The patient was given at-home trays filled with desensitizing gel (Relief ACP Zoom), which also contains remineralization agents to increase the microhardness of the enamel (Figure 8).7
The residual oxygen from the bleach decreases the bond strength, therefore, it may require a minimum of 7 days for the bond strength to return to normal (Figure 9).14 Two weeks later, anesthesia was administered, and all extrinsic stains on the teeth were removed using pumice on a soft prophy brush. Shade selection and mockup were immediately performed. Shade selection was accomplished by curing small increments of enamel shades (Filtek™ Supreme Ultra A1E and B1E, 3M ESPE; Premise™ B1E, Kerr Dental, www.kerrdental.com; and IPS Empress® Direct B1E, Ivoclar Vivadent, www.ivoclarvivadent.com) onto the teeth to be treated. In this case, Ivoclar IPS Empress Direct B1E was determined to have the best match to the surrounding tooth structure.
In order to produce a seamless undetectable transition from tooth to restoration, an infinity bevel preparation was started with a medium grit diamond bur (Brasseler M862-009, Brasseler USA, www.brasselerusadental.com) and placed 0.5 mm into the dentin. The bevel was carried 2 mm past the fracture lines. The lingual surface was prepared with a chamfer of 0.8 mm in thickness to allow for a bulk of composite that will resist fracture with tooth flexure. Next, the tooth was microetched (Microetcher® II, Danville Materials, www.danvillematerials.com) and rinsed. Because all of the bonded surfaces were enamel, the total-etch technique was employed, and a 37% phosphoric etch was placed past the margins of the infinity bevel onto unprepared tooth and agitated with a microbrush for 15 seconds. The etch was then rinsed off of the tooth for 5 seconds and lightly air-dried with care to leave the preparation visually moist. A coat of universal adhesive containing 10-methacryloyloxydecyl dihydrogen phos-phate (MDP) (All-Bond Universal®, Bisco, www.bisco. com) was scrubbed onto the preparation with a microbrush, then the excess solvent was evaporated by thoroughly air-drying for 10 seconds. When the tooth had achieved a glossy appearance, it was ready to be light-cured for 10 seconds. This total-etch and adhesive technique was used on all of the augmented surfaces of teeth Nos. 7 and 8.
Following etching, the palatal enamel walls of teeth Nos. 7 and 8 were developed freehand up to the height of the incisal edge with IPS Empress Direct BL-LE. To match the contralateral teeth, an additional 1 mm composite rope of BL-XLD was placed along the incisal edge. The dentin shade B1-D was rolled into a ball and smoothed and feathered over the bevel. A second increment was used to form the lobe. It is important to observe this layer from an incisal view to ensure that it is not built too thickly. To create the halo effect, opalescent composite Trans 30 was placed between the lobes (Figure 10). Shade B1E was placed as a final facial layer and light-cured for 20 seconds.
Next, the primary anatomy was refined using finishing and polishing discs (Sof-Lex™, 3M ESPE). When performing these adjustments, it is important to evaluate the result from all views and mimic the contralateral tooth in shape, form, and surface texture. A final luster was attained using spiral-finishing wheels (3M ESPE), followed by a felt wheel with polishing paste (Enamelize™, Cosmedent, www.cosmedent.com) (Figure 11 through Figure 13).
Conclusion
Transformations of appearance may happen on the outside, but there is no denying the overpowering effect that they have on how patients feel on the inside. Improving patients’ appearances with whiter teeth can really boost their confidence levels. There is a huge disconnect between the whitening needs and desires of patients and the actual usage of whitening, which is directly related to the value that dentists communicate. All patients deserve the best whitening options available, so take the time to share this article with the entire team and implement these strategies for success. Following these simple steps will help to ensure patient retention, new patient generation, and increased revenue.
Acknowledgment
The author would like to thank Dr. Joe Ontiveros and Dr. Newton Fahl for their intellectual expertise as well as Dr. Jean Martin for editing.
References
1. Talamas SN, Mavor KI, Perrett DI. Blinded by beauty: attractiveness bias and accurate perceptions of academic performance. PLoS One. 2016;11(2):e0148284.
2. Oral Care – US – May 2013. London, England: Mintel Group Ltd; 2013.
3. Philips Oral Care. Data on file. Whitening Usage & Attitude Survey. StrateSci Inc Marketing Research. Whittier, CA; 2012.
4. Li Y, Lee S, Kwon SR, et al. A randomized, parallel-design clinical trial to assess tooth bleaching efficacy and safety of light versus non-light activated chairside whitening. Philips website. Data on file, 2012. http://www.usa.philips. com/content/dam/b2c/category-pages/personal-care/POHC/resource-library-docs/A-Randomized-Parallel-Design-Clinical-Trial-to-Assess-Tooth-Bleaching-Efficacy-and-Safety-of-Light-versus-non-Light-Activated-Chairside.pdf. Accessed April 3, 2017.
5. Kwon SR, Wertz PW. Review of the mechanism of tooth whitening. J Esthet Restor Dent. 2015;27
(5):240-257.
6. Ontiveros JC, Paravina RD. Color change of vital teeth exposed to bleaching performed with and without supplementary light. J Dent. 2009;37
(11):840-847.
7. Lee SS, Kwon SR, Arambula M, et al. Assessment of whitening efficacy of two in-office professional bleaching regimes. Center for Dental Research, Loma Linda University. International Association for Dental Research. March 2013.
8. Young N, Fairley P, Mohan V, Jumeaux C. A study of hydrogen peroxide chemistry and photochemistry in tea stain solution with relevance to clinical tooth whitening. J Dent. 2012;40(suppl 2):e11-e16.
9. Haywood VB, Caughman WF, Fraizer KB, Myers ML. Tray delivery of potassium nitrate-fluoride to reduce bleaching sensitivity. Quintessence Int. 2001;32(2):
105-109.
10. Ochiai K, Sung EC, Chung J, Caputo AA. Effect of remineralizing agents on enamel microhardness after bleaching. J Dent Res. 2007;86(spec iss A).
11. Park S, Kwon SR, Qian F, Wertz PW. The effect of delivery system and light activation on tooth whitening efficacy and hydrogen peroxide penetration. J Esthet Restor Dent. 2016;28(5):313-320.
12. Croll TP, Donly KJ. Tooth bleaching in children and teens. J Esthet Restor Dent. 2014;26(3):
147-150.
13. Charakorn P, Cabanilla LL, Wagner WC, et al. The effect of preoperative ibuprofen on tooth sensitivity caused by in-office bleaching. Oper Dent. 2009;
34(2):131-135.
14. Barghi N, Godwin JM. Reducing the adverse effect of bleaching on composite-enamel bond. J Esthet Dent. 1994;6(4):157-161.
About the Author
Joyce L. Bassett, DDS, FAACD, FAGD
Private Practice
Scottsdale, Arizona
Clinical Instructor
Kois Center for Advanced
Dental Education
Seattle, Washington