

Abutment Selection for Implant Restorations
A number of considerations factor into treatment planning implants.
Philip G. Kotick, DDS; Barry Blumenkopf, DDS
Implants have become an integral and predictable facet in the present-day practice of dentistry. Patients have become more knowledgeable and sophisticated in their demands for further options from the restorative dentist. It is both the medicolegal as well as the moral responsibility of every practitioner to offer the most current procedures as elective treatment options.
The existence of numerous implant systems in the marketplace has a tendency to intimidate both novice and experienced practitioners, possibly leading them to shy away from involvement in the practice of implant dentistry. Aside from the economic benefits to a practice, it adds a tremendous feeling of satisfaction knowing that a product can be delivered that has an extremely high success rate and that can transform patients who were once dentally compromised into dentally functioning adults. Personally, in his 25 years of performing both implant surgery and restorations, the primary author has not found a single patient who has said that they regret having gone through the implant experience.
There is a learning curve that must be experienced in order to establish proficiency, but these authors do believe that every dentist has the ability to attain a substantial degree of success. Whether or not the clinician is educated in the surgical phase of implant dentistry, they must gain an understanding of the system that they or their referring surgical specialist have chosen to use. The basic steps of making a final impression for an implant restoration remains consistent with all implant systems. This article will try to delineate basic restorative knowledge and some of the nuances associated with several other implant systems. The only armamentarium required for implant restorations are: one long and one short wrench and one torque wrench for each system to be restored.
Custom Abutments vs. Prefabricated Abutments
A custom abutment is one in which the practitioner must make either a tissue or a bone-level impression of the implant with the help of a transfer impression coping. A prefabricated abutment is machine made, seated and torqued atop the implant, prepared as needed, and treated as a conventional post-and-core restorative treatment procedure. It is these authors’ opinion that using a custom abutment is by far the most efficient way to restore an implant crown; however, it is also the most costly. The use of the prefabricated abutment will reduce both the cost and number of visits and should be carefully assessed as an option available for restoration.1
When arriving at the office for restoration of an implant, the patient will present with a healing abutment screwed onto each of the implants. It is at this time when a determination is made as to whether to use a custom or prefabricated abutment. There are some instances when the use of a prefabricated abutment is contraindicated: 1) there is insufficient interocclusal space, where the abutment would not have sufficient height to retain a crown; 2) the implant requires an angle of correction greater than 15º; 3) the collar height (the distance between the implant platform and the gingival margin) is more than 1 mm greater than the largest collar height offered by the manufacturer; and 4) the need for splinting three or more implants in a quadrant when parallelism is required. If the clinician desires to splint three or more implants together in one quadrant, preparation for parallelism can be quite challenging.
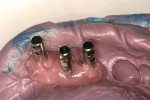
After removing the healing abutment, the implant restorative platform is exposed. The periodontal probe is then used as a guide. The angle of the implant and how it relates occlusally to the opposing dentition can be determined visually by having the shaft of the probe exit the center of the implant. If the decision has been made to use a prefabricated abutment, then the following must be recorded: 1) the diameter of the implant platform (eg, narrow, regular, or wide, determined from your referring surgeon); 2) the collar or cuff height (the distance between the implant platform and the gingival margin) at the mesial, distal, buccal, and lingual locations; 3) the interocclusal height (the distance between the implant platform and the opposing dentition); and 4) whether a straight or angled abutment is needed.2 If a custom abutment is used, the size of the platform of the implant is recorded (information received from the referring surgeon) and a transfer coping is selected based on an open or closed tray design.
CAD/CAM Abutments
The use of computer-aided design technology is now available for fabrication of custom abutments. An example of CAD/CAM abutments is the Atlantis™ abutment (Astra Tech Dental, www.astratechdental.com).3 Atlantis VAD™ (Virtual Abutment Design) is a patented process using 3D-optimized scanning software to generate an exact virtual image of the upper and lower implant-level model. Using the Atlantis software, the patient-specific abutments are individually designed from the final tooth shape. Atlantis abutments are available in zirconia, titanium, or gold-shaded titanium. It is also available for all major systems, including Astra Tech, Biomet 3i (www.biomet3i.com), Nobel Biocare (www.nobelbiocare.com), Straumann (www.straumann.us), and Zimmer Dental (www.zimmerdental.com).
This technology would be an alternative for the laboratory using a UCLA abutment (a gold-plastic abutment used for waxing a custom abutment or screw-retained crown) in fabricating a custom abutment.
Closed Tray vs. Open Tray
When, restoratively, a custom abutment is required, a choice must be made between using a closed or open tray transfer impression coping. In the authors’ opinion, the open tray in the hands of the novice clinician is easier to attain quick competency. The open tray impression coping is one that is screwed to the implant body and, to ascertain proper seating, is radiographically verified. A hole is drilled through the stock plastic impression tray to allow the long screw to pass through the tray. An impression is made using a rigid material (eg, polyether, polyvinylsulfide). When the impression material is set, the transfer coping is unscrewed completely from the implant body and the impression is then removed with the transfer inside. An implant analog, which is a replica of the implant body, is screwed to the transfer coping within the impression that is sent to the laboratory for the fabrication of the custom abutment and crown. The only contraindication to this technique would be insufficient intraoral access to unscrew the impression coping once the material has set.
Another technique that can be used when there is insufficient space is using a closed tray impression coping. This impression coping is screwed to the implant body. Once the impression is set it is removed from the oral cavity. The closed tray impression coping remains in the mouth. It is then unscrewed and removed. An implant replica (analog) is attached and the entire unit (coping plus analog) is then reinserted into the impression (to aid the reseating of the coping back into the impression in the proper orientation, a notch can be placed on the buccal surface). This is sent to the laboratory for fabrication of the custom abutment and crown. The use of the open tray technique vs. closed tray eliminates operator error with regard to placement of the coping–analog unit back into the impression accurately. Both methods work well in the hands of the experienced clinician.
The Angulated Prefabricated Abutment
The use of the angulated abutment can be quite challenging. In the case of Nobel Biocare’s Replace® Select Implant, the internal mechanism uses a three-lobed triangle, thereby allowing only three possible positions to angle the abutment.4 The angle of the abutment can only be positioned in the direction of the base of the triangle (180º from the apex; Figure 1 and Figure 2). For example, if an implant is surgically placed too far to the lingual and the base of the triangle is in the lingual position, a buccal orientation required to correct the improper angulation could not be achieved with a prefabricated abutment. A knowledgeable surgeon, knowing that the implant is in a poor position, will correctly position the implant surgically to give the restorative dentist the best esthetic outcome. In this situation, a custom abutment would be indicated. Other implant systems (eg, Biomet 3i, Zimmer Dental, Straumann, BioHorizons) use either a hexagon or octagon, therefore allowing a greater number of options for the correction of a malpositioned implant. Straumann synOcta® has one more option with regard to the direction of its angulated abutment and the octagon.5 They designate both type “A” and type “B” abutments. In type “A,” the angulation of the abutment faces in the direction of one of the apices of the octagon. In type “B,” the angulation of the abutment faces in the direction of the flat side of the octagon. This allows 16 different positions of the angulated abutment. Remember, an angled abutment can only be used if the correction is within 15º (both 15º and 20º corrections available with Straumann synOcta).
Selection of the Prefabricated Abutment
There are several designs of standard abutments available today. They are fabricated out of titanium alloys as well as zirconium. An abutment can be selected with a fixed collar height 360º for posteriors or a variable collar height (lower on the facial, higher on the lingual), called an “esthetic abutment,” for both anteriors and bicuspids. For ease of impression making, selection of an abutment with a collar height that is within 0.5 mm to 1 mm of the maximum cuff height measurement is obtained. This facilitates the placing of retraction cord. However, selecting a collar height that is no greater than 1 mm subgingival of the lingual–gingival height may also leave the practitioner with a finishing line that is supragingival in the esthetic buccal (facial) region.
Preparation of the Prefabricated Abutment
The preparation of prefabricated abutments in the oral cavity is a procedure that should be avoided whenever possible. The heat that is produced even when in the presence of ample water supply and the potential sparking of the hard titanium metal may be detrimental to both the success of the implant and safety of the patient.
The preparation of the prefabricated abutment can be performed, for the most part, outside of the oral cavity. The following series of photographs will help to illustrate the procedures, which will lead to a quality laboratory result. The abutment is tried in the proper position and checked with a radiograph for accuracy of fit (Figure 3). Using a #1556 carbide bur (round-ended cross-cut fissure bur), depth cuts are placed along the buccal aspect of the abutment marking the estimated gingival finish line. Also, a depth cut is placed estimating the occlusal height (Figure 4). The occlusal height must be at least 1.5 to 2 mm below the opposing arch and at least 1 mm from the marginal ridges of the ipsilateral teeth in order to receive an adequate esthetic result.
The abutment is now removed from the oral cavity and is ready for indirect preparation. For ease of preparation, the abutment is either screwed to an abutment holder or an implant replica (analog) matching that type of abutment (Figure 5). With the same #1556 bur, the depth cuts are connected while establishing a chamfer finish line to the depth of the bur (Figure 6). Using the same bur, several vertical cuts are made on the superior part of the abutment down to where an occlusal mark exists (Figure 7). The bur is then moved horizontally connecting those vertical cuts (Figure 8). Because the alloy that is being prepared is very resistant, slicing the surface in smaller increments becomes easier and more efficient.
The next step is to eliminate undercuts that have been created with the carbide bur. This can be accomplished with a chamfer diamond stone. While preparing the surface of the abutment, it is of paramount importance that the tip of the diamond together with the shaft contacts the entire metal surface at the same time (Figure 9). This ensures that all undercuts have been removed. The final step in this procedure is to polish any alloy tags that have been created on the surface of the abutment.6 This can be accomplished with a rubber wheel or any polishing wheel that has been selected (Figure 10). The surface of the abutment is polished together with the margin, keeping in mind not to create any undercuts that have just been eliminated (Figure 11). The abutment is now ready to be tried in the mouth (Figure 12). Because the buccal (facial) margin has already been prepared, the placement of the abutment in the correct position should be relatively easy and a second radiograph should not be necessary. The abutment is now torqued into position according to the manufacturer’s recommended specifications. A small piece of cotton or gutta-percha is placed to protect the screw and a provisional filling material is placed to cover the screw hole. The abutment is now treated as a conventional crown-and-bridge procedure. Retraction cord is placed and an impression is made. A provisional can also be fabricated at this time to protect the abutment.
Screw Type vs. Cementable Restorations
The restoration of choice is a screw-retained crown when there is insufficient interocclusal space.7 That is, the custom abutment and crown are now one and the same (both are fabricated from a UCLA abutment). The use of this design, however, is not limited to this situation alone. Many practitioners prefer screw retention for all of their restorations, as it allows for retrievability.8 When one has placed sufficient numbers of each restoration, individual preference regarding these types of restorations are established.
Special Abutments
Several implant companies have a special prefabricated abutment that should not be prepared.9 When there is sufficient interocclusal height (at least 7.5 mm from the implant platform to the opposing occlusal table) and the position of the implant is in a relatively straight position, this type of abutment can be used.
An example is Nobel Biocare’s Snappy Abutment (Figure 13).4 When the abutment is received, it is positioned properly, radiographically verified, and torqued to 35 Ncm. A plastic sleeve is then fitted and snapped into place over the abutment (Figure 14). A conventional impression is then taken of the sleeve. The use of this type of abutment precludes the packing of cord. A solid one-piece abutment replica is then inserted into the plastic sleeve, which has already been embedded into the impression material (note: this procedure is similar to an open-tray design whereby the plastic sleeve becomes the transfer coping). This can now be sent to the laboratory for fabrication of the crown. A special cover, which is included, is placed over the abutment to protect adjacent soft tissues (Figure 15).
Soft Tissue Model
When an impression is sent to the laboratory (either closed or open tray) to fabricate a custom abutment, a gingival component is incorporated into the stone master cast to represent the soft tissues surrounding the implant. This aids the technician in the waxing of both the abutment and crown. The charge for this service can range anywhere from $10 to $40. If desired, practitioners can eliminate the cost of this procedure by fabricating the soft tissue component themselves, placing the polysiloxane material into the impression surrounding the implants. The material is now available with an automix cartridge system (Figure 16). It is also important to remember that if vinylpolysiloxane is being used as an impression material, the surfactant (separating medium) enclosed in the kit is needed to eliminate the adherence of similar materials to one another.
Conclusion
When a patient presented with one missing tooth just 30 years ago, the restoration of choice was either a 3-unit conventional FPD or Maryland bridge (resin-bonded FPD). Restorative options have changed today with the very predictable single-tooth implant. There is no need to prepare virgin teeth for this procedure assuming the patient has good quality and volume of bone. In many cases of poor bone quality, the individual site can be grafted surgically into a more desirable area for implant placement.
The implanted tooth stands alone and, in many cases, is a healthier alternative to the use of floss threaders beneath a pontic. There are several choices in the decision tree that are available to the clinician regarding implant restorations. A custom or prefabricated abutment, straight or angulated, titanium or zirconium (used in the esthetic area or for posterior all-porcelain crowns), able to be prepared or not, regular or esthetic collar, screw-type or cementable, can be used. With implants achieving greater than a 90% success rate in many studies,10-13 it is important for clinicians to educate themselves in the practice of predictable implant dentistry.
Disclosure
Any opinions expressed in this article by Drs. Kotick or Blumenkopf are based on anecdotal evidence. Neither of the authors have any financial interest or are being compensated in any way by the implant companies or products mentioned.
Acknowledgment
Dr. Kotick would like to thank his wife Felice for her support in the preparation of this manuscript, and he would also like to thank Kenneth Kurtz, DDS, for his invaluable support. .
References
1. Giglio GD. Abutment selection in implant-supported fixed prosthodontics. Int J Periodontics Restorative Dent. 1999;19(3):233-241.
2. Briley TF. Single implant tooth replacement. J Dent Technol. 1998;15(1):16-20.
3. Astra Tech Inc. Astra Tech Dental Catalog. 2010.
4. Nobel Biocare Services AG. Nobel Esthetics Product Catalog. 2005.
5. Straumann USA, LLC. Crown and Bridge Restorations with the synOcta® Prosthetic System. 2007.
6. Barbour ME, O’Sullivan DJ, Jenkinson HF, Jagger DC. The effects of polishing methods on surface morphology, roughness and bacterial colonisation of titanium abutments. J Mater Sci Mater Med. 2007;18:1439-1447.
7. Shadid R, Sadaqa N, A comparison between screw vs. cement retained implant prostheses. A literature review. J Oral Implantol. 2010 Nov 23 [Epub ahead of print].
8. Prisco R, Morgano SM, D’Amato S. New abutment for a screw-retained, implant-supported crown. J Prosthet Dent. 2001;85(1):30-33.
9. Christensen GJ. Selecting the best abutment for a single implant. J Am Dent Assoc. 2008;139(4):484-487.
10. Buser D, Mericske-Stern R, Bernard JP, et al. Long-term evaluation of non-submerged ITI implants. Part I: 8-year life table analysis of a prospective multi-center study with 2359 implants. Clinical Oral Implants Research. 1997;8(3):161-172.
11. Jung RE, Pjetursson BE, Glauser R, et al. A systematic review of the 5-year survival and complication rates of implant-supported single crowns. Clin Oral Implants Res. 2008;19(2):119-130.
12. Blanes RJ, Bernard JP, Blanes ZM, Belser UC. A 10-year prospective study of ITI dental implants placed in the posterior region. I: Clinical and radiographic results. Clin Oral Implants Res. 2007;18:699-706.
13. Simon RL. Single implant-supported molar and premolar crowns: a ten-year retrospective clinical report. J Prosthet Dent. 2003;90(6):
517-521.
About the Authors
Philip G. Kotick, DDS
Clinical Assistant Professor
Department of International Comprehensive Dentistry
Faculty Member
Cariology and Comprehensive Care Department
New York University College of Dentistry
New York, New York
Barry Blumenkopf, DDS
Clinical Assistant Professor
Department of International Comprehensive Dentistry
Faculty Member
Cariology and Comprehensive Care Department
New York University College of Dentistry
New York, New York
Private Practice
Staten Island, New York


 www.coltene.com
